The risk of systems getting physically compromise, particularly for portable systems such as laptops, puts sensitive data at risk of compromise. Encrypting its data mitigates the risk of getting exposure if system is lost.
Most linux supports partition encryption through the Linux unified Key Setup on-disks-format (LUKS) technology. Encryption of partition is easiest at installation time, but LUKS can also be configured post installation.
We are using Red Hat 7.4 as our testing system.
Encryption at Installation
When performing an interactive installation, select the Encrypt checkbox during partition creation to encrypt the partition. The system will prompt for a passphrase to use in decrypting a partition when this option is selected. The passphrase needs to be manually entered every time when the system boots.
When performing automated installations, kickstart can create encrypted partitions. Use the --encrypted and --passphrase option for each partition to be encrypted. For example, this command would encrypt /home partition:
$ part /home --fstype=ext4 --size=10000 --onpart=vda2 --encrypted --passphrase=PASSPHRASE
The passphrase, PASSPHRASE is stored in kickstart profile in plaintext, so the kickstart profile must be secured. Omitting the --passphrase=option will cause the installer to pause and ask for the passphrase during installation.
Encryption Post-installation
Steps to create encrypted volume:
- Create either a physical disk partition or a new logical volume.
- Encrypt the block device and design it a passphrase.
$ cryptsetup luksFormat /dev/vdb1
- Unlock the encrypted volume and assign it logical volume.
$ cryptsetup luksOpen /dev/vdb1 name
- Create a file system in the decrypted volume.
$ mkfs -t ext4 /dev/mapper/name
As shown in figure1 partition has been encrypted and opened and finally file system is associated with the partition.
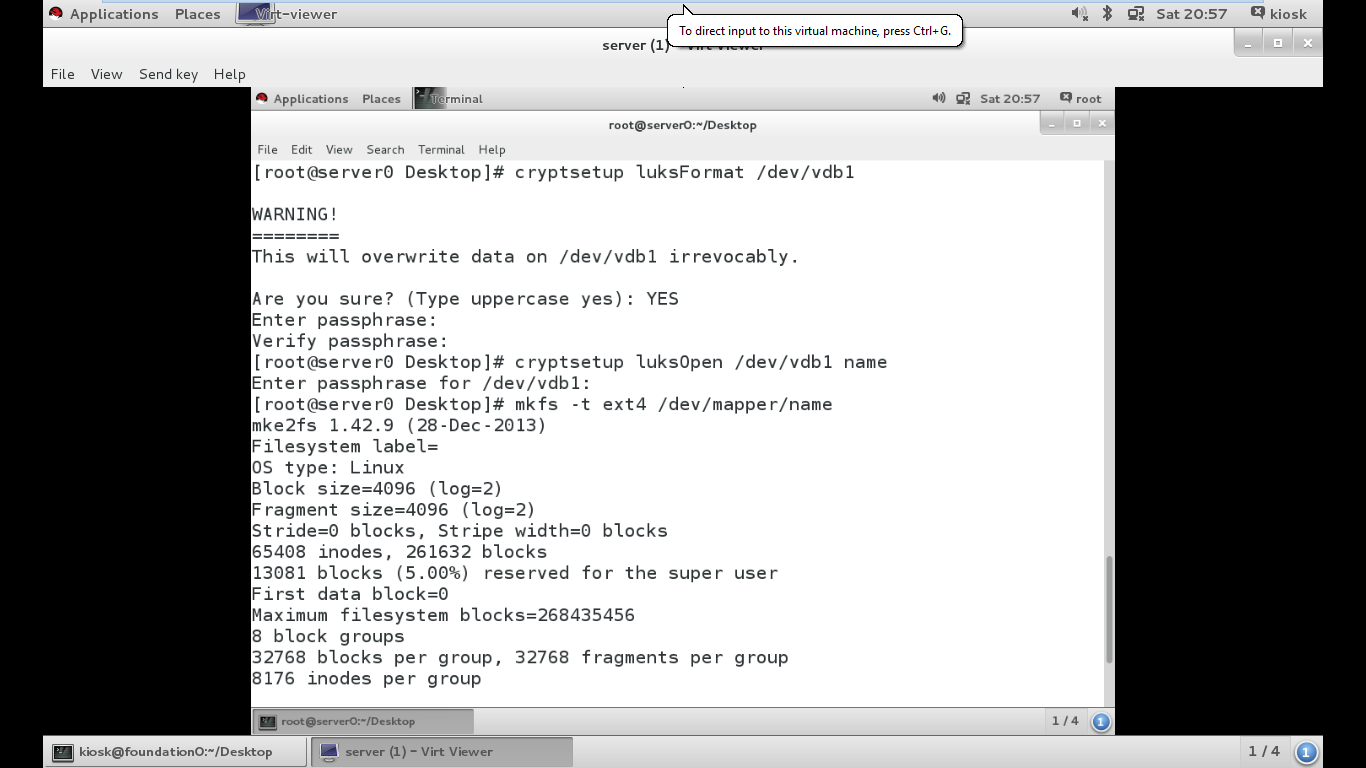
Figure1: Encrypted partition having ext4 file system.
- Create a mount point for the file system, mount it, then access its contents.
$ mkdir /secret
$ mount /dev/mapper/name /secret
We can verify the mounted partition using df -h command. As shown in figure2.
- When finished, unmount the file system then lock the encrypted volume.
$ umount /secret
Directory should be unmounted before closing the LUKS partition. After the partition has been closed the partition will be locked. It can be verified using df -h command as shown In figure2.
$ cryptsetup luksClose name
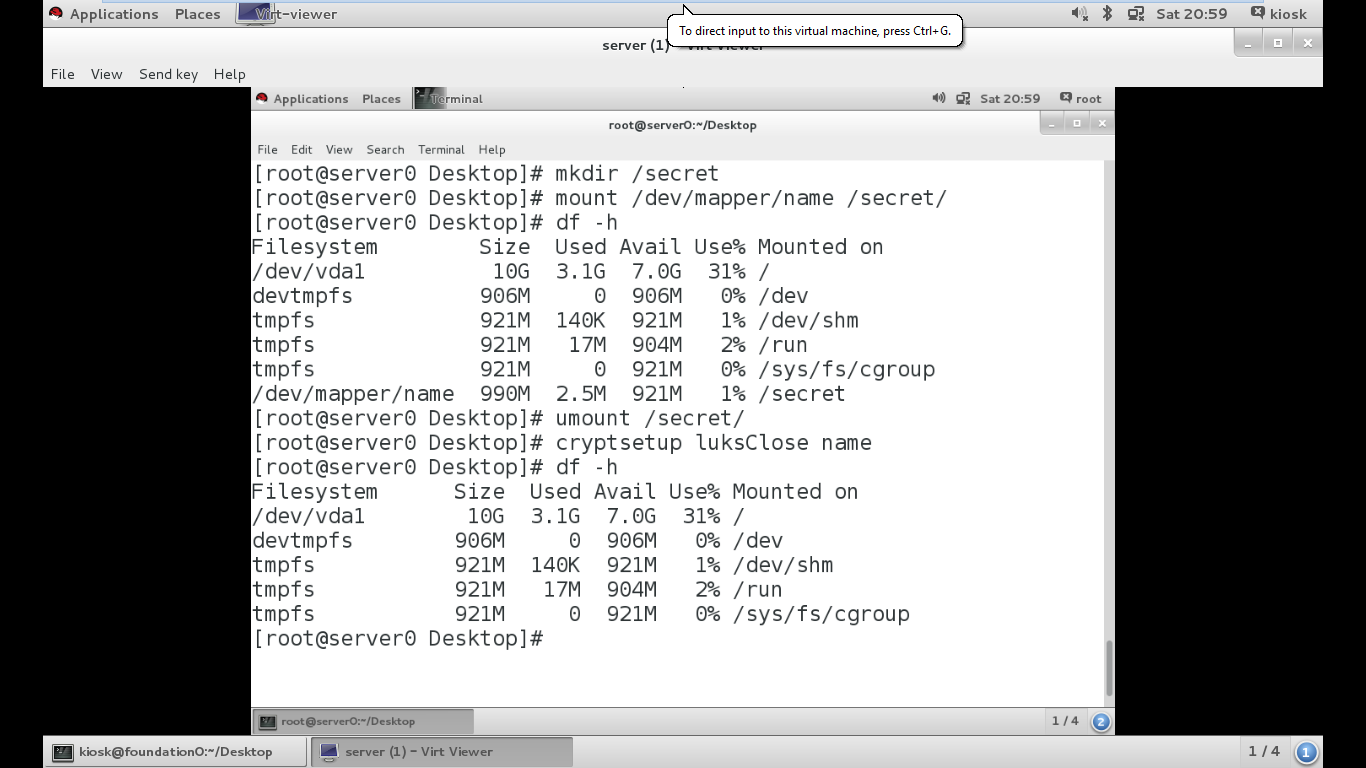
Figure2: Encrypted partition has been locked and verified.
Persistently Mount Encrypted Partitions
If a LUKS partition is created at installation time, normal system operation prompts the user for the LUKS passphrase at boot time. This is a fine for a laptop, but not for servers that may need to be able to reboot unattended.
To boot a server with an encrypted volume unattended, a file must be created with a LUKS key that will unlock the encrypted volume. This file must reside on an unencrypted file system on the disk. Of course this presents a security risk if the file system is on the same disk as the encrypted volume because theft of the disk would include the key needed to unlock the encrypted volume. Typically the file with the key is stored on removable media such as a USB key.
Steps to configure a system to persistently mount an encrypted volume without human intervention:
- Locate or generate a key file. This is typically created with random data on the server and kept on a separate storage device. The key file should take random input from /dev/urandom and generate our output /root/key.txt with block size of 4096 bytes as a one count of random numbers.
$ dd if=/dev/urandom of=/root/key.txt bs=4096 count=1
Make sure it is owned by root and the mode is 600.
$ chmod 600 /root/key.txt
Add the key file for LUKS using the following command
$ cryptsetup luksAddKey /dev/vda1 /root/key.txt
Provide the passphrase used to unlock the encrypted volume when prompted.
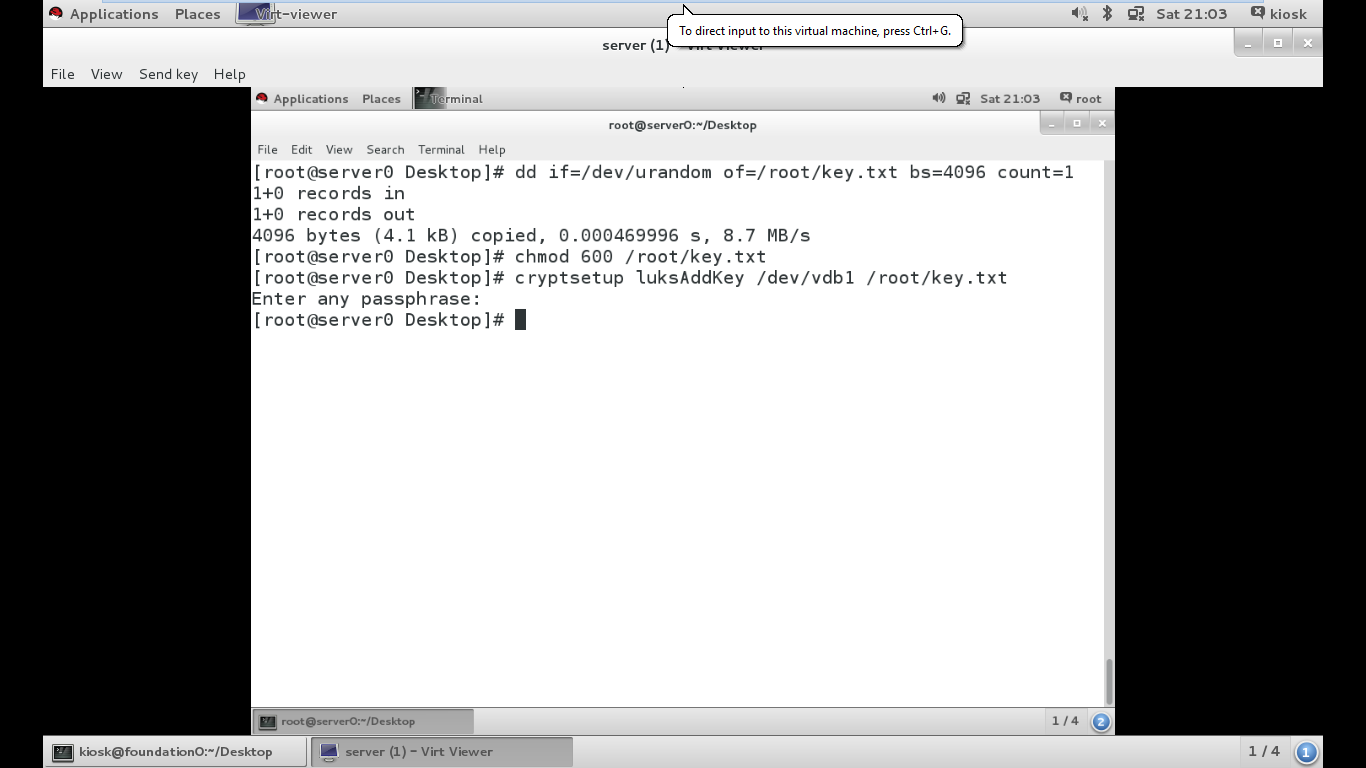
Figure3: A key file has been generated and added to the LUKS partition
- Create an /etc/crypttab entry for the volume. /etc/crypttab contains a list of devices to be unlocked during system boot.
name /dev/vdbN /path of key file
/etc/crypttab lists one device per line with the following space separated fields:
- Name device mapper will use for the device.
- The underlying locked device.
- The absolute pathname to the password file used to unlock the device (if this field is left blank, or set to none, the user will be prompted for the encryption password during system boot)
- Create an entry in /etc/fstab like the following
As shown after making the entry in /etc/fstab we have opened the partition using key file the command will be
$ cryptsetup luksOpen /dev/vdb1 --key-file /root/key.txt name
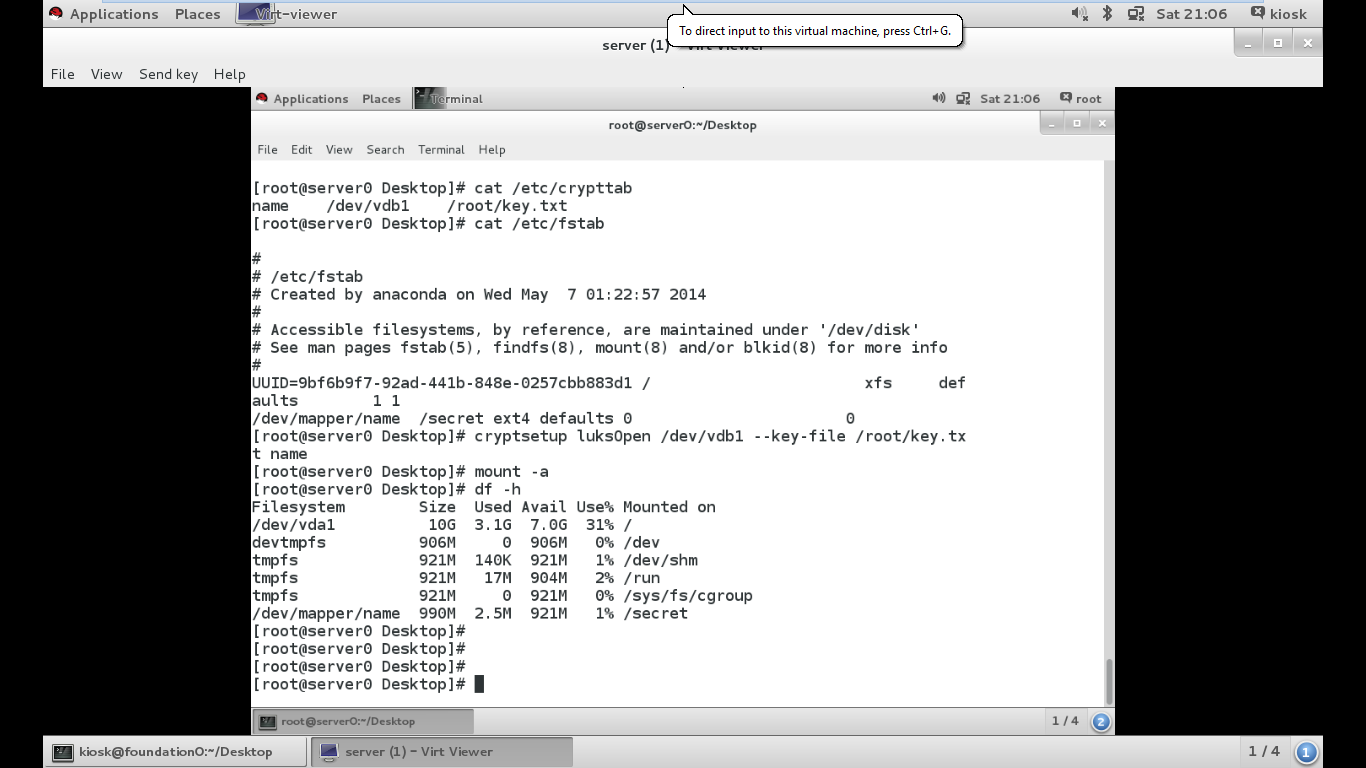
Figure4: Decryption of persistent encrypted partition using key file.
As shown the entry of fstab file the device to be mounted is supplied then the file system on which the encrypted partition should be permanently mounted is other entries. Also no passphrase has been asked separately now as we have supplied key file which has been added already to the partition. Now partition can be mounted using mount -a command after the mounted partition can be verified upon reboot by using df -h command. All the steps are clearly described in below figure.
The device listed in the first field of */etc/fstab* must match the name chosen for the local name to map in */etc/crypttab*. This is a common configuration error.
Attaching a key file to desired slot
LUKS offers a total of eight key slots for encrypted devices (0-7). If other keys or passphrase exists they can be used to open the partition. We can check all the available slot by using luksDump command as shown below.
$ cryptsetup luksDump /dev/vdb1
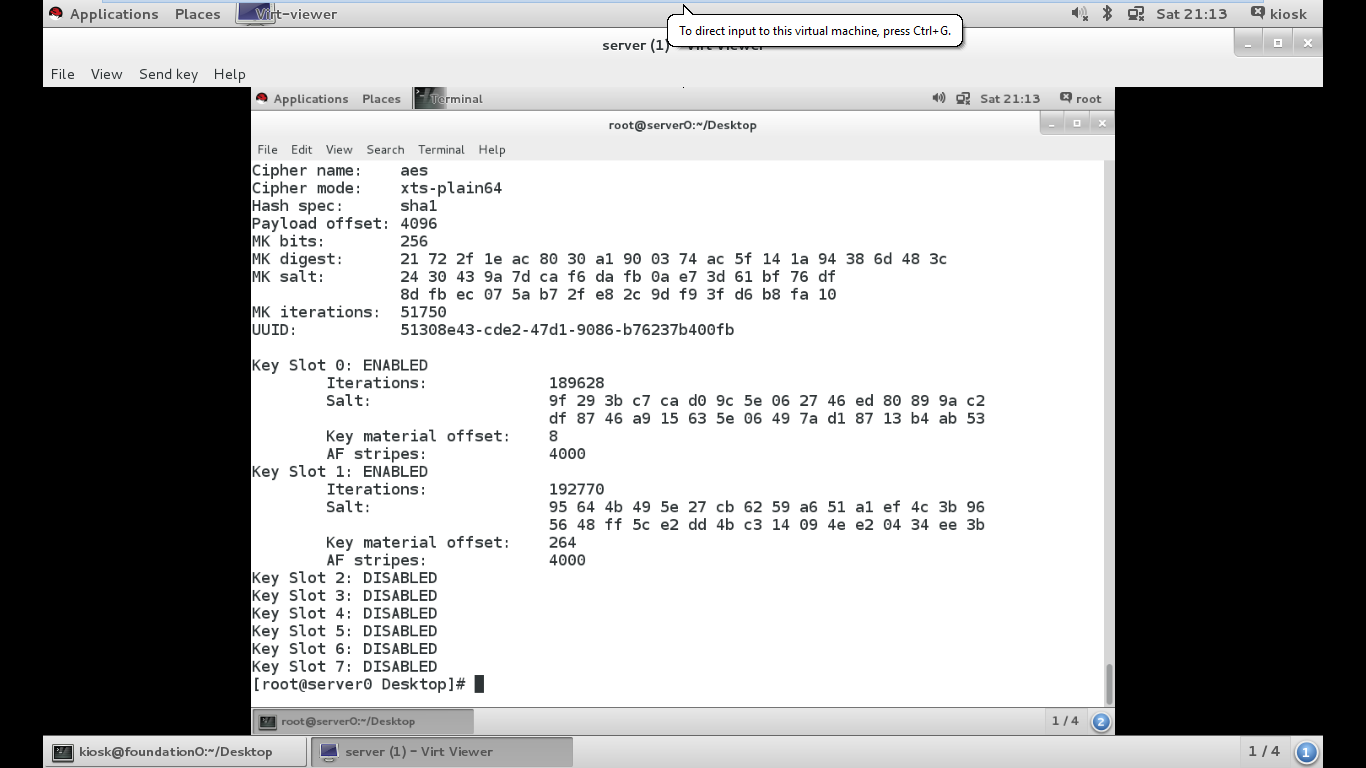
Figure5: Available slots for encrypted partition are shown.
As shown in figure it shows Slot0 and Slot1 enabled. So the key file we have supplied manually by default moves to slot 1 which we can use for decrypting the partition. Slot0 carries master key which is supplied during the creation of encrypted partition.
Now we will add key file to slot3 for this we have to generate a key file of random number from urandom command then we will add it to slot3 as shown below. The passphrase of the encrypted partition must be supplied for adding any secondary key to encrypted volume.
$ dd if=/dev/urandom of=/root/key2.txt bs=4096 count=1.
$ cryptsetup luksAddKey /dev/vdb1 --key-slot 3  /root/key2.txt.

Figure6: Secondary key file key2.txt has been added at slot3.
After adding secondary key we will again run luksDump command to verify that the key file has been added to slot3 or not. As shown in the below image the key file has been added to slot3. As the slot2 remains disabled and slot3 has been enabled with key file supplied. Now slot3 can also be used to decrypt the partition.
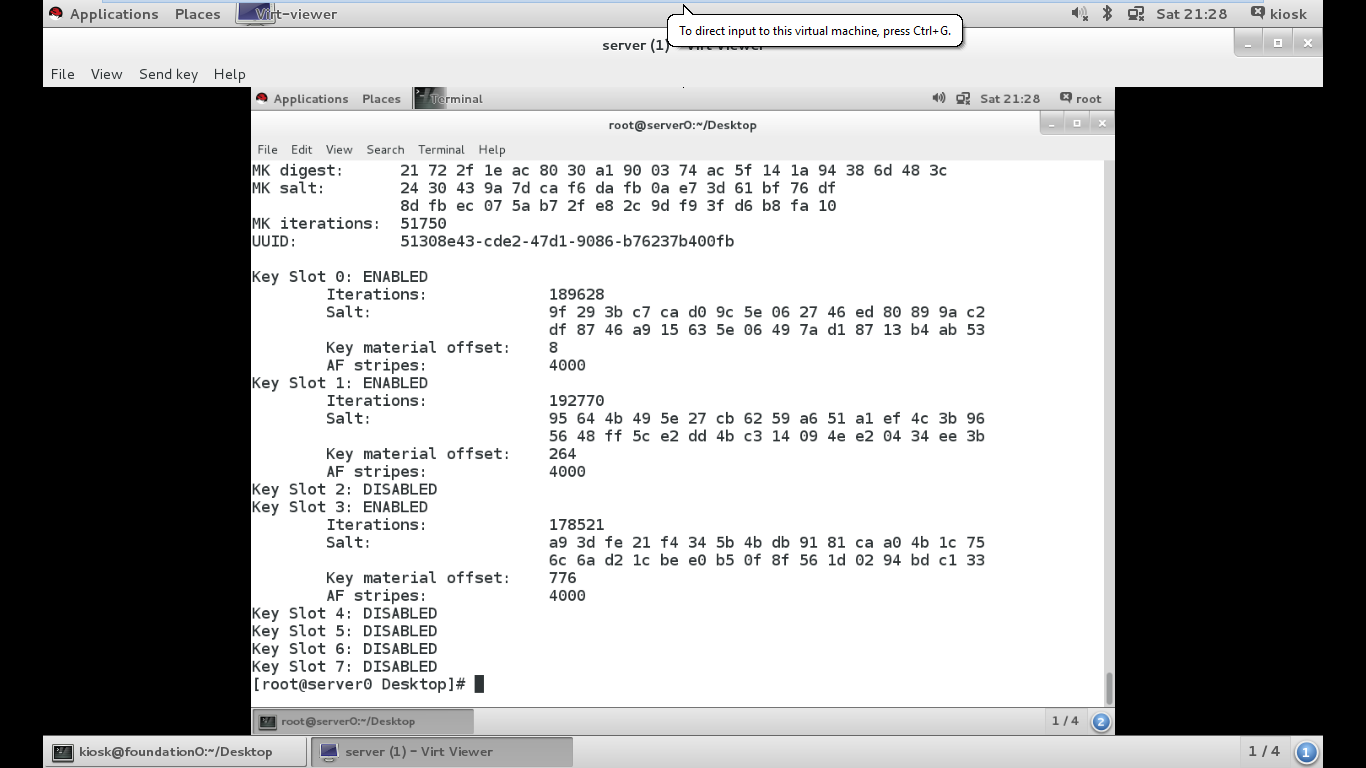
Figure7: Key slot3 enabled successfully.
Restoring LUKS headers
For some commonly encountered LUKS issues, LUKS header backups can mean the difference between a simple administrative fix and permanently unrecoverable data. Therefore, administrators of LUKS encrypted volumes should engage in the good practice of routinely backing up their headers. In addition, they should be familiar with the procedures for restoring the headers from backup should the need arise.
LUKS header backup
LUKS header backup are performed using cryptsetup tool in conjuction with the luksHeaderBackup subcommand. The location of header is specified with --header-backup-file option. So by the command shown below we can create the backup of any LUKS header.
$ cryptsetup luksHeaderBackup /dev/vdb1 --header-backup-file /root/back
As with all system administration tasks, LUKS header backup should be made before each and every administrative task performed on a LUKS-encrypted volume. Suppose LUKS header has been corrupted, LUKS stores a metadata header and key slots at the beginning of each encrypted device. Then a corruption of LUKS header can render the encrypted data inaccessible. If a backup of the corrupted LUKS header exists the issue can be resolved by restoring the header from backup.
Testing and recovering LUKS headers
If an encrypted volume’s LUKS header has been backed up, the backups can be restored to the volume to overcome issues such as forgotten password or corrupted headers. If multiple backups exist for an encrypted volume, an administrator needs to identify the proper one to restore. The header can be restored using the following command.
$ cryptsetup luksHeaderRestore /dev/vdb1 --header-backup-file /root/backup
Now suppose someone changed the password of our encrypted partition /dev/vdb1 using luksChangeKey but we don’t know the password so we have the only option to restore the partition from the backup which we have created above so that we can decrypt the partition from the previous passphrase. The backup also helps when admin forgets the passphrase.
Backup of /dev/vdb1 has been taken initially then the passphrase of /dev/vdb1 has been changed as shown below by someone without our presence.
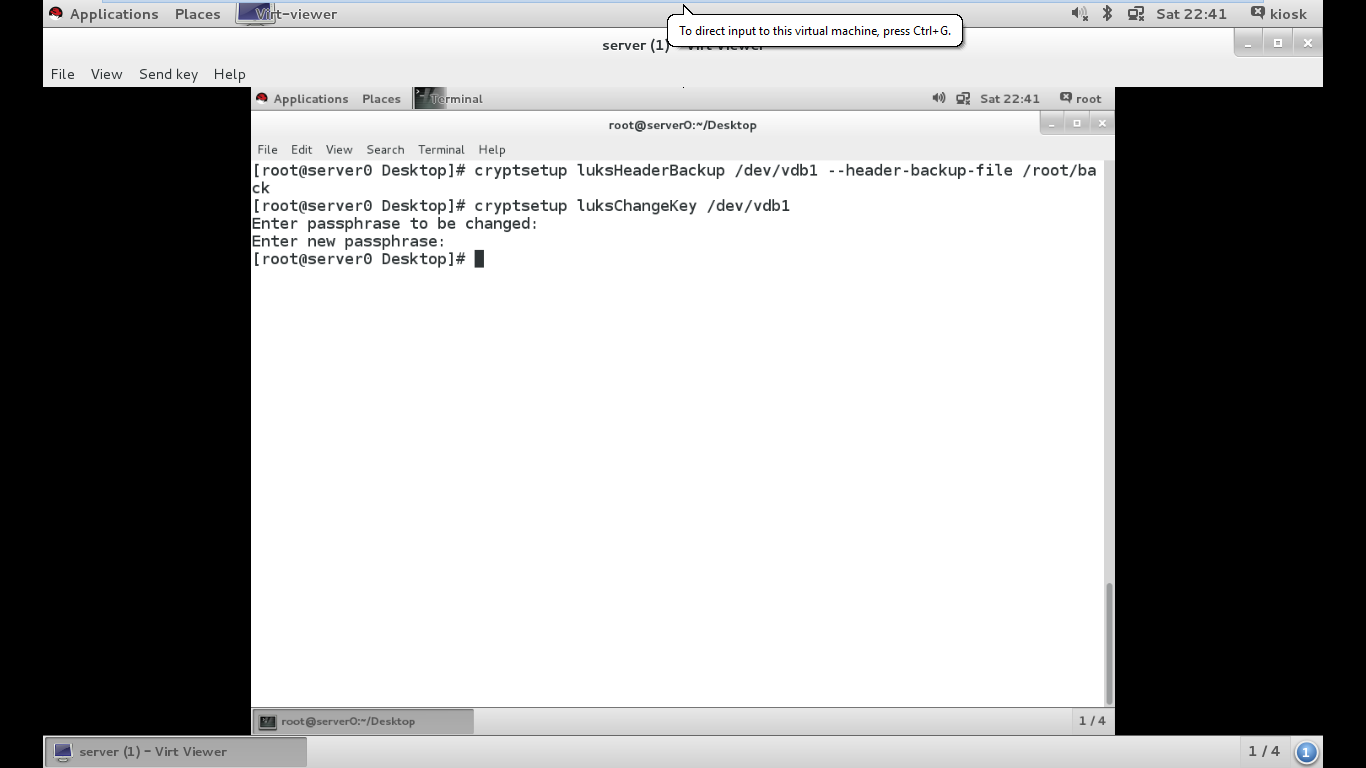
Figure8: Passphrase has been changed.
Before closing partition we have to unmount the locked partition. After closing the partition when we tried to open the partition by using passphrase which was set by us earlier we get error “no key available with this passphrase” because passphrase has been changed by someone as shown in figure below.
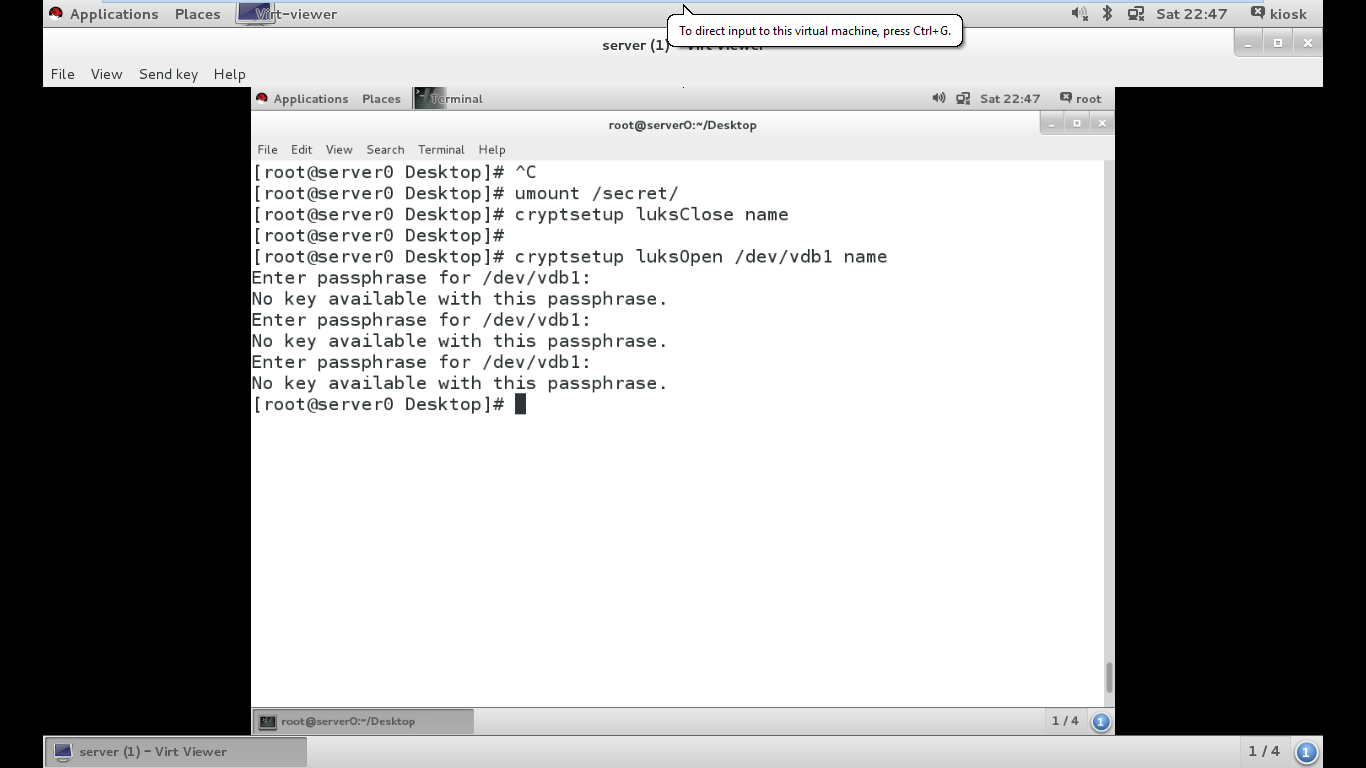
Figure9: Decrypting partition with passphrase supplied initially.
But as the backup was already taken by us so we just have restored the LUKS header from the backup file which was create earlier. As shown the header was restored.
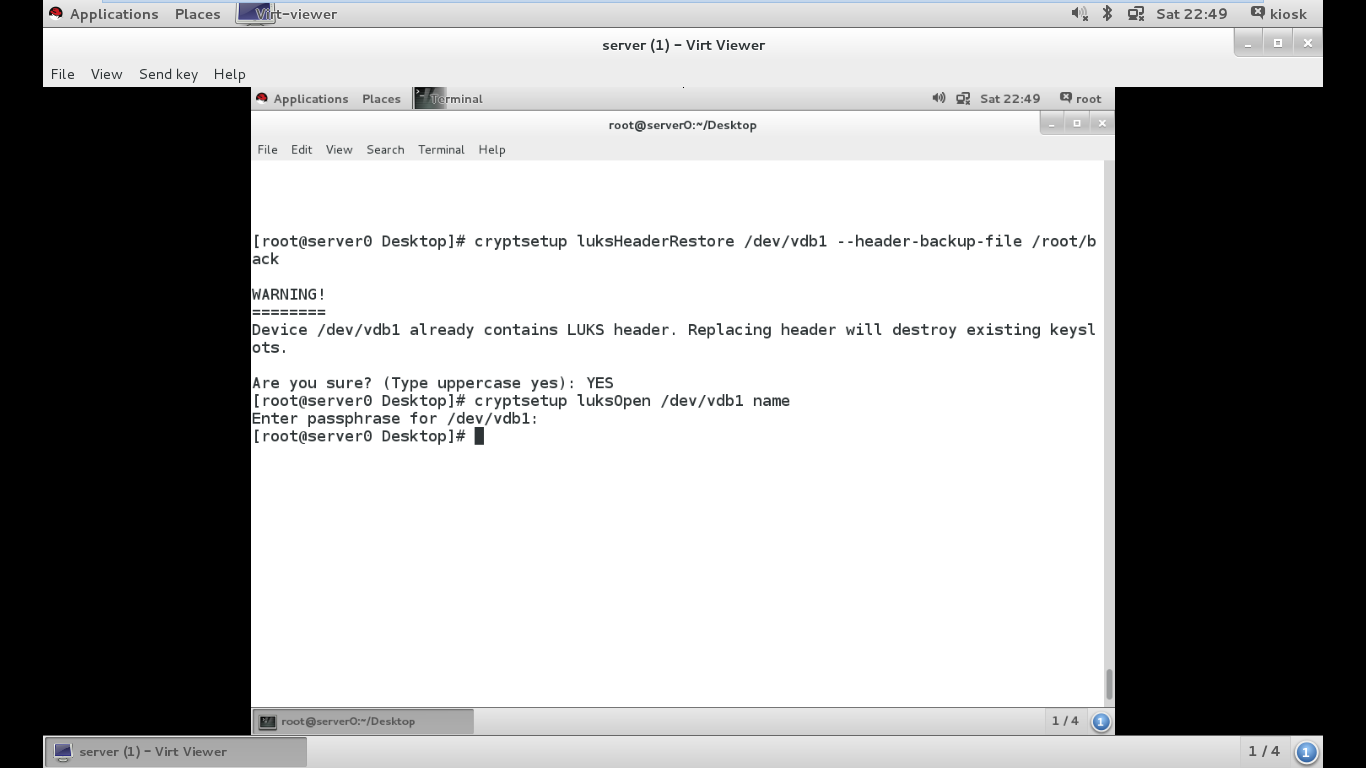
Figure10: Header was restored from the backup file.
Now we can open the header with the earlier set passphrase. So It is always beneficial for administrators to always create a backup of their header. So that they can restore if somehow existing header corrupts or some password change has been made.